
“My parents were avid travellers and photographers and took thousands of 35 mm slides documenting our many trips when I was growing up. I was bitten by the same bug, and have fully “documented” my travels in the 70’s and 80’s with 35 mm slides. For years we would watch our travel slides projected onto a screen using a Kodak Carousel projector. The slides were organized in carousel trays holding either 80 or 140 slides.
Over the last 30+ years, the slides have only been seen a few times as it requires a dark room and some setup (projector, screen, etc.) I decided it was time to convert the family slides into digital images that could be easily viewed on a PC or TV and shared with my childeren and grandchildren. The result is this project.
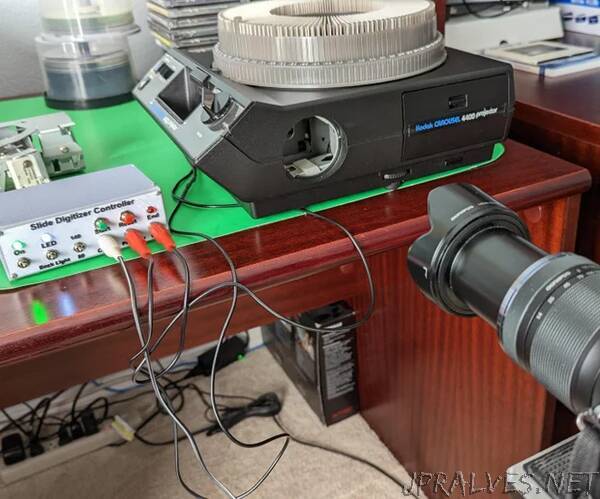
The goal was to “automatically” digitize over 40 boxes of slides stored in carousel trays, without having to remove the slides from the trays if possible, while maintaining close to the original slide sharpness and dynamic range. The concept was to modify a standard Kodak Carousel projector to enable a digital camera to focus through the front of the projector directly onto each slide after it dropped down from the carousel tray. The slides are back illuminated with a LED white light source. Once the camera snaps the picture, the projector automatically advances to the next slide and the process repeats itself. This Instructable provides all the details for accomplishing this.
The following is an overview of the steps needed:
- Modify a Kodak Carousel Projector enabling a digital camera to focus directly onto the slides;
- Build an LED illuminator which fits into the back of the Kodak projector in place of the original light source and condensing optics;
- Build an Arduino-based controller that synchronize advancing the slides, waiting for the camera to stabilize, triggering a digital camera, and keeping count and stopping the process when the 80 or 140 slide tray is complete;
- Load software into the Arduino Nano;
- Modify a (commercially available) wired remote camera shutter trigger enabling the controller to trigger the camera;
- Modify the Carousel remote control to enable the controller to advance the slides;
- Set up the projector, camera (tripod mounted), and electronics. Use the camera optical zoom to maximize the size of the slide, and start the process.
- Use an off-the-shelf software package to batch post process the raw digital images (flipping, cropping, labelling) for easy viewing.
Modifications to the Kodak Carousel projector are easily reversible enabling it to be returned to its original state. Although this project describes the modifications to a Kodak Carousel projector, the techniques can probably be adapted for other old-school slide projectors. The process also works with a bulk loader, but the process has to be manually ended by pressing the reset button.
Important note: The goal is to use a digital camera to focus on the slide inside the Carousel projector (no projection lens). I wanted as many camera pixels on the slide as possible for best results. I recommend a zoom lens to magnify the slide as much as possible. You also need the camera to be able to focus as close to the slide, less than about 18 inches if possible. A macro lens should work the best. If your digital camera does not have interchangeable lenses and you don’t have a zoom lens or your camera/lens combination won’t focus in to about 18 inches, this approach to digitizing slides may not work for you. Some testing out lenses, zoom levels, and spacing to determine all this is suggested. There is no reason to think that this approach would not work with a cell phone.
All mechanical designs and modelling were completed with Autodesk Fusion360.
Supplies
The major items required are a Kodak Carousel Projector (with remote hand control), a digital camera with zoom for recording the slides (with new SD card), an LED backlight mounted in the projector, and the Slide Digitizer Controller with miscellaneous cables. (Note that the Carousell Projector lamp does not have to work since it’s being removed, but the slide advance mechanism must work.) I was able to purchase a Kodak Carousel projector for this project on Craigslist for under $30 if you don’t already have one.
The table is a list of all the items and materials needed to complete the project along with a suggest acquisition source. I believe that everything is available on Amazon.
In addition, the following tools are needed:
- 3-D Printer with filament (black, white, and silver PLA)
- Soldering iron, solder, soldering wick
- USB cable with Mini-B connector for programming the Arduino Nano
- Miscellaneous hand tools”