
“A year ago today we launched our Raspberry Pi Pico board, the first product powered by the RP2040 microcontroller, a brand-new chip developed right here at Raspberry Pi. A year later we’ve sold nearly 1.5 million Picos, and thousands of you have used RP2040 in your own electronic projects and products.
A lot has happened over the last year, and everyone here at Pi Towers has their own list of favourite projects and products they’ve seen or played with. With the launch of Raspberry Pi Direct on Monday we’re sure to see a lot more really soon. So if you’re interested in getting started with RP2040 in hardware you should go read the “Hardware design with RP2040” and take a look at the associated minimal viable design.
While there is a growing hardware ecosystem around the RP2040, it’s been really interesting to see a software ecosystem grow alongside it. Although I wouldn’t call the development landscape for Raspberry Pi Pico and other RP2040-based boards mature, at least not quite yet, it’s starting to get there. Because a year on from launch, we’ve seen a proliferation of language ports.
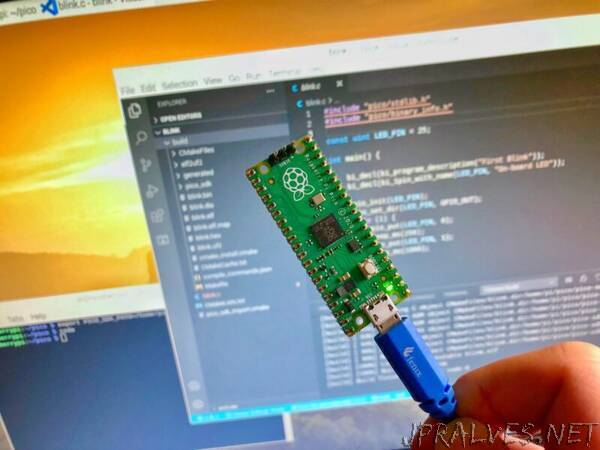
When you’re writing software for hardware, the first program that is run in a new programming environment is typically turning an LED on, off, and then on again. Learning how to blink an LED gets you halfway to anywhere. We’re going to go ahead and blink the onboard LED on Pico, which is connected to pin 25 of the RP2040 chip.
So it’s time to figure out how to get from “zero to blink” in as many languages as we can manage in this post.
C
The Raspberry Pi Pico C/C++ SDK is the place to start for Pico and other RP2040-based boards. The C SDK is what the other language ports use to talk to the underlying hardware, if you’re writing in Python or one of the other language ports, typically what those languages are using to talk to the chip is the C SDK. But of course, you can go directly to the C SDK yourself.
MicroPython
The official port of MicroPython shipped alongside Raspberry Pi Pico, and the C SDK, back in January last year. It’s probably your first port of call if you’re more comfortable with Python than C.
Our colleagues over at the Raspberry Pi Foundation have a walkthrough on how to get started with MicroPython and the Thonny editor on Raspberry Pi Pico, and inevitably the first thing they teach you to do is to blink the onboard LED on and off again.
CircuitPython
The “other Python” that runs on Raspberry Pi Pico and other RP2040-based boards is CircuitPython. Also released alongside Pico at launch last year, while CircuitPython looks somewhat like MicroPython there are some differences.
While I’d generally point folks towards MicroPython if they need advanced features like interrupts and threading — or complete access to the RP2040’s Programmable I/O (PIO) in Python — for library support for sensors and other breakouts I would point you to CircuitPython. It’s well supported by our friends at Adafruit.
Adafruit also has a great walkthrough on how to get started with CircuitPython and the Mu editor on Raspberry Pi Pico, and again the first thing you do after you’ve got everything installed is to blink the onboard LED on and off again.
Javascript
Since launch there have been other development options added to the ecosystem. Among them is a Javascript port called Kaluma. Kaluma is a tiny JavaScript runtime for microcontrollers powered by JerryScript. Released into the wild relatively recently, if you are a JavaScript developer familiar with Node.js you can now work with Raspberry Pi Pico without learning a new language.
There is some excellent documentation on how to get started with Kaluma and its web development environment, or with the command-line interface if you’d prefer to develop locally rather than in your browser. Inevitably, the first thing they have you do is to blink the onboard LED on and then back off again.
Arduino
Interestingly there are actually two entirely independent ports of the Arduino core targetting the RP2040 chip and the Raspberry Pi Pico.
The first to appear was a community port that sits on top of the “bare” C SDK along with a custom GCC 10.3 and Newlib 4.0 based toolchain. There is extensive documentation on how to get started with the community port, as well as how to use it with the work-in-progress PlatformIO integration.
There is also the official port of the Arduino environment. Released just a few weeks after the community port, like a lot of the more recent Arduino platform ports, the core sits on top of Arm Mbed rather than directly on top of the C SDK. If you already have the Arduino environment installed, installation of the official RP2040 port works directly through the Boards Manager menu.
Either way, the code to blink the onboard LED on and then off again is exactly the same.
Rust
One of the earliest arrivals on Raspberry Pi Pico after launch, there is now fairly mature Rust support for RP2040 with a Hardware Abstraction Layer (or HAL) crate for the RP2040 chip, and Board Support Package crates for a number of RP2040-based boards, including of course the Raspberry Pi Pico. Alongside this, there is also a project template intended as a starting point for developing your own firmware based on the RP2040 HAL.
While there isn’t extensive getting started documentation, at least not for those who aren’t already Rust people, there are a few good tutorials kicking around which predictably start by turning the onboard LED on and then back off again.
Lua
Lua on embedded hardware rose to popularity as some of the early community-built firmware available for the ESP8266 chip from Espressif. With NodeMCU’s arrival, the ESP8266 became more than a way to give other micro-controllers a cheap WiFi connection; it became a micro-controller in its own right.
The Lua environment for RP2040 is still at the proof-of-concept stage, but building it from source and usage are well documented in the project’s Github repository. As well as the Lua run-time, the project includes a rudimentary shell that accepts Linux-like commands, a full-screen editor, and basic file management facilities. It supports general, polled, GPIO operation for digital I/O, analogue input, I2C read and write, and hardware PWM. It runs on a single core, leaving the other core idle. There is currently no support for DMA, interrupts, threading, or multi-core operation.
You can however turn the onboard LED on and off again in only a few lines of code.
Go
TinyGo brings the Go programming language to embedded systems by creating a new compiler based on LLVM. Installation is well documented, and so is getting started. There’s also an excellent walkthrough on YouTube to help you get started blinking the onboard LED on and back off again.
FreeRTOS
FreeRTOS isn’t a language port. Instead, it’s an entire real-time operating system (RTOS) for microcontrollers that supports SMP across both of the RP2040’s cores. If you’ve not worked with an RTOS before there is some excellent getting started documentation, along with a number of good tutorials that start you off by blinking the onboard LED on and back off again and with FreeRTOS.
Where now?
Hopefully, we’ve hit your favourite language, or RTOS, during this post. But if not, there’s still hope. There are a number of other language ports underway at various levels from .NET to Forth and Ada, but if nobody is working on a port of your favourite language…maybe you should give it a go yourself?
Support for developing for Pico can be found on the Raspberry Pi forums. There is also an (unofficial) Discord server where a lot of people active in the new community seem to be hanging out. You can find the details on how to get started, along with links to more detailed PDF documentation, on our documentation site. Feedback on the documentation should be posted as an Issue to the pico-feedback repository on Github, or directly in the relevant repository.
You can find the documentation from your Pico very easily. To access the documentation, just press and hold the BOOTSEL button on your Pico, plug it into your laptop or Raspberry Pi, then release the button. Go ahead and open the RPI-RP2 volume, and then click on the INDEX.HTM file. That will always take you to the documentation.”