
“In this tutorial, we will learn how to use I2C Pins in Raspberry Pi Pico & go through the I2C Scanner Code.
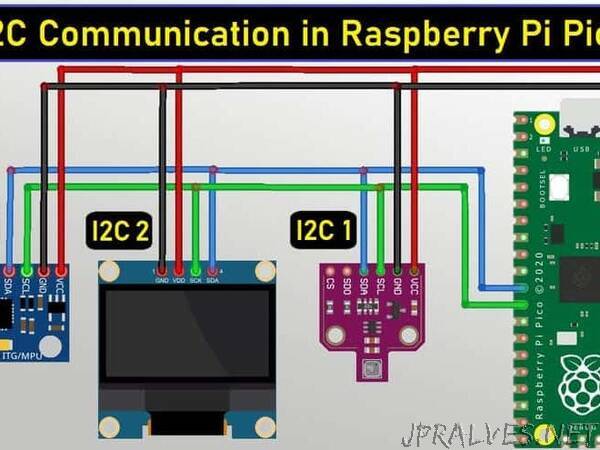
In this tutorial, we will learn how to use I2C Pins in Raspberry Pi Pico & go through the I2C Scanner Code. The Raspberry Pi Pico is built using an RP2040 microcontroller. The board exposes 26 multi-function GPIO pins from a total of 36 GPIO pins. The 10 GPIO Pins are not exposed, hence they can’t be used. Out of the 26 usable GPIO pins, there are 2 pairs of I2C Pins which will be discussed in this post.
We will see what is I2C Communication protocol and how does it work. We will also learn in detail about the I2C Pin of Raspberry Pi Pico. We will take I2C Scanner Code as an example and check how the I2C Address of a few I2C enabled sensors & modules. Before that, you can check our Raspberry Pi Pico Getting Started Tutorial to learn more about the module.
What is I2C Communication Protocol
I2C (Inter-Integrated Circuit) is a synchronous, multi-master, multi-slave, packet-switched, single-ended, serial communication bus. It is widely used for attaching lower-speed peripheral ICs to processors and microcontrollers in short-distance, intra-board communication.
Like UART communication, I2C only uses two wires to transmit data between devices.”