
“Automatic charger for NiMh batteries built on Arduino.
You can buy some battery charger in the near supermarket, but for sure it is better to create your very own charger and have fun.
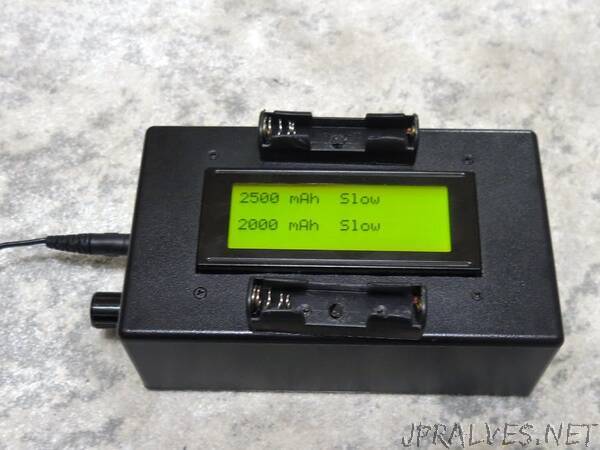
This charger can be used to slow and fast charge the batteries and also is allowing to restore your old batteries. The charger is based on Arduino micro controller, atmega328p-pu and displays whole usable information to the LCD character screen 16x2 or 20x4 one. It allows to charge up to two batteries independently. You can charge only one battery or charge two different capacity batteries or two similar batteries simultaneously. Before charging you batteries, you have to setup the battery capacity, charging speed and loop counts for each battery slot then you insert your battery to the slot and the process begins.
The charger supports three charging modes:
Fast charging. The battery should completely charged in 5 hours. The charging current depends on battery capacity and equal to 0.2C;
Slow charging. The battery should completely charged in 10 hours. The charging current equal to 0.1C.
Restore charging. The charging current in this mode is limited to 40mA. The restoration time depends on battery capacity. This mode can be used to restore the battery capacity and to charge old batteries that cannot be charged by other chargers.
Charging process consists of several phases:
Discharging phase. The battery discharged through internal resistor to 0.9 v.
Pre-charge phase. The battery charged by small current, about 30mA until the battery voltage become 1.0v.
Main charging phase. The battery charged by the calculated current depending on battery capacity and charging mode (fast, slow restore). The battery charging phase finish if the voltage drop detected, or battery become too hot or the upper voltage limit will be reached.
Post-charge phase. The battery charged by the small current until another voltage drop or the upper voltage limit.
Complete phase. The battery is charged by short pulse of current till you remove it from the charger.
The charging process runs through whole phases if you setup no loop before charging your battery. If you selected to run several charging loops, the charger will restart discharging process right after main charging phase complete until loops count will be reached. You can use several loops charging to restore you battery capacity.
The charger has three temperature sensors: one for each battery slot and another one to control the temperature of the internal heat sink installed over power transistors. To chill-down internal heat sink a small fan installed inside the charger. The fan automatically switched on when the heat sink temperature reaches the maximum limit. And the fan will be turned off when the heat sink become colder.
The charger schematics is shown on the pictures below. To simplify the schematics readings, it is spitted on three parts: the controller part and two channels. Both charging channels are very similar the only difference are the output and input signals and components numbers.”