
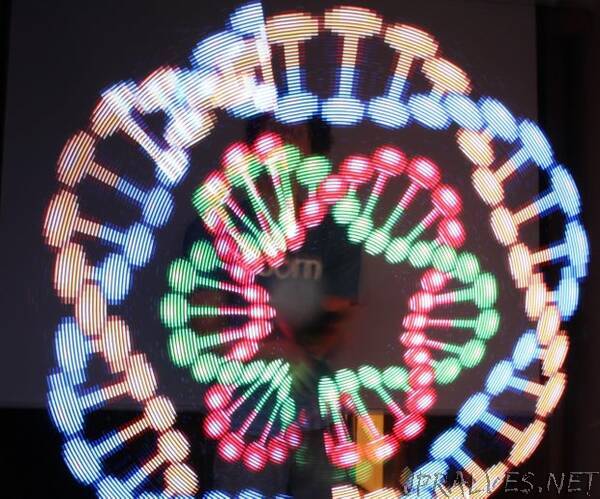
“It is well known that even after a light has been turned off, human eye keeps “seeing” it for a fraction of second. This is known as Persistence of Vision, or POV, and it allows one to “paint” pictures by quickly moving a strip of LEDs, drawing one line of an image at a time in quick succession. If you search online (e.g. on Etsy), you can find quite a few toys based on this idea: pois, staffs, and more.
However, these are expensive: typical prices for a POV staff of decent resolution start at $500, and they use proprietary software, so there is no easy way to modify their behavior or add extra functionality. Thus, when looking for a birthday gift for a friend who enjoys painting with light, I decided to create my own open source version using readily available components.
My project builds upon the outstanding work of Phillip Burgess and Erin St Blaine from Adafruit; however, I made a few changes, upgrading the electronics.
Below are key features of this project:
It is a two-sided staff, of total length 141 cm (55in); it is not collapsible. Each side of the staff has two 50cm/72 pixels LED strips, for the total of 288 LEDs. Thus, you can use it to show images with 72-px resolution.
Staff is powered by two 18650 Li-Ion batteries, which should be enough for at least 1 hr show, possibly as much as 2 hours, depending on intensity of your images. The batteries can be recharged via micro-USB connector; full charge time is about 5 hrs.
Images (in bitmap format) can be easily uploaded to the staff by connecting the staff to a computer, where it appears as a USB storage device. It has enough memory for about 50 images.
The staff contains an Inertial Motion Unit (IMU) which can be used to detect when the staff is in motion. The software uses it to adjust update frequency for images, so the images will not appear stretched or compressed regardless of how fast you are rotating it. You can also use it for controlling your show: e.g. stopping the staff horizontally is used as a signal to move to the next image in the slideshow.
The software is based on Arduino IDE. It is available under an open source license and is easy to modify
This project is open source; all code and schematics are available in my github repository under MIT license.
Supplies:
You will need the following supplies:
APA102 (DotStar) LED strip, 144 LED/meter, black PCB, from Adafruit or Aliexpress. You need 4 strips of 50cm (72 LEDs); you can also buy longer strips and cut them into 50cm pieces. The strips should not be waterproofed. Adafruit strips come with waterproof sheathing which you can just remove and discard.
Two 18650 Li-Ion batteries. Look for high-capacity (at least 3000mAh), protected batteries from a reputable manufacturer such as Panasonic, Samsung, or Sanyo; I recommend these batteries by Sanyo or Panasonic. Do not try to save money by buying no-name battery on eBay or Amazon.
Polycarbonate tube, 11F(55in/141cm), 1 inch outer diameter, from flowtoys.com
Two endcaps and tennis grip for the tube from Amazon
1/2 inch square wood dowel, from HomeDepot or any other hardware store. You need 4 ft (or two 2ft pieces)
Adafruit ItsyBitsy M4 or ItsyBitsy nRF52840microcontroller. The nRF52840 is slightly more expensive, but it comes with Bluetooth, which opens many additional possibilities. However, current version of my code doesn’t use Bluetooth - this is planned for future upgrades. Do not use 32u4 or M0 ItsyBitsy - they do not have enough RAM for our purposes.
Custom POV shield board for ItsyBitsy and two custom power distribution boards designed by myself. You can make them yourself by downloading the schematics, BOM, and Gerber files from github, or buy all three together from my store on Tindie
Rocker switch
Wiring: it is best to use silicone-insulated wiring, as it is much more flexible than regular PVC insulated one. You need 20 AWG wires for power (2.5m red, 1 m black) and 24-26 awg for signal (two different colors of your choice, 50 cm each)
8mm diameter black shrink wrap tubing, 1 meter
Three JST XH 4 position connectors with 15 cm or longer wire leads, 22awg. Such connectors are commonly used as balancing leads for charging lithium battery packs. Note that 4 position connector would be sold as 3s balancing lead (one lead for each of battery cells and one for common ground).
If you are comfortable crimping your own connectors, you can buy instead JST XH housing and contacts from Digikey or Mouser and make your own leads; this would simplify some of the steps below.
3d printed spacers and switch mount. The STEP files can be found in the hardware folder of the github repository. You will need 3 spacers and one switch mount. You can use any 3d printer and any kind of filament (PLA, ABS, …).
Narrow (2mm) black zipties. Note: most 4 in zipties have width of 0.1”=2.5mm, which is too wide for us - you really need 2mm or narrower.
Breakaway male headers, 0.1”
If you are buying your LEDs from AliExpress and are prepared to wait 3-4 weeks for free delivery option, the total price of the components above would be about $150 (including shipping). If you are buying your LEDs from Adafruit, add $60 to the price above.
If you choose to spray-paint the wood dowels black for better look (recommended), you also need black spray paint.
You can buy the kit of parts which contains some (but not all!) of the above parts from my store on Tinidie: https://www.tindie.com/stores/irobotics/. This way, you can avoid buying a pack of ten endcaps when you only need two.
Tools
You will need the usual tools and supplies: wire strippers, flush cutters, scissors, decent soldering iron, shrink wrap, electric tape, heat gun for shrinking the shrink wrap, sharp model knife or utility knife. Needless to say, you will also need a computer to program the microcontroller and a USB charger to charge the batteries.
It is assumed that you already have some experience with Arduino and with basic electronic projects, at least at the level of soldering headers to boards or splicing wires.”