
“What
This is a step-by-step tutorial on how to take a regular shirt and use LEDs and arduino to turn it into a light up shirt (undoubtedly much better than a regular shirt.)You could totally use the same steps with a hat, skirt, bag, etc - anything you want to cover in LEDs.~~A full build video will be added by Friday 6th March~~
Why
This shirt is perfect for:Festivals! Raves!Tuesdays evenings!Any time you want to make a good impression, e.g. job interviews!
How
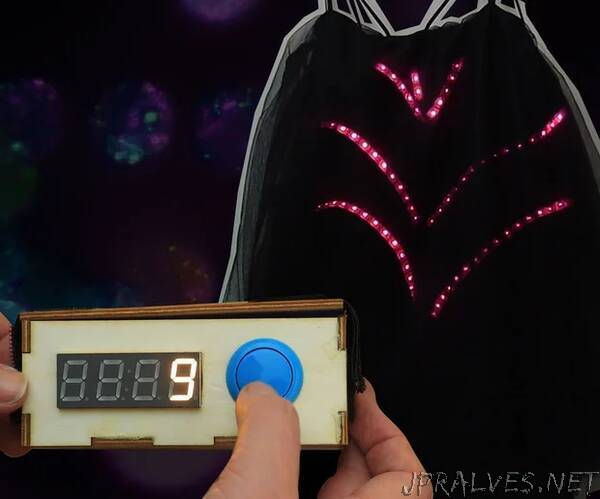
I took an existing shirt and added LEDs to it, rather then starting from scratch and making the shirt itself. This gave me a solid base to work from and allowed me to focus on the light-up-ness rather than learning how to make clothes. I then sewed tulle (net fabric) over the top of the LEDs for diffusion. I also made a little box to hold all the electronics, added a button so I can change the patterns, and a display because it’ll be nice to be able to see what pattern I’m on - and because displays are cool.
There are 4 main parts to the project:
1. Design - Figuring out how to layout the LEDs.
2. Electronics - Soldering together the LEDs, buttons and screen.
3. Sewing - Attaching the LEDs and diffusion fabric.
4. Control box - To house the batteries, arduino, button and display.
Level
I try and write my tutorials in such a way that someone with absolutely no experience at all can at least enjoy reading it and get an idea of how stuff works.
This one is particularly suitable for people who have used Arduino a bit before, and ideally you should have a little bit of practice soldering - especially to solder the display.
Code
All of the arduino code is on my github here.”