
“This article shows how you can build a minimal microcontroller on a breadboard based on the ATmega4809, the microprocessor used in the latest AVR-based Arduino boards
It includes a USB-to-serial converter so you can connect it to your computer’s USB port and program it from the Arduino IDE.
Introduction
Arduino’s successors to their classic Arduino Uno board are the Arduino Nano Every [1] and the Arduino Uno WiFi Rev2 [2]. These are based on the ATmega4809 [3], one of Microchip’s AVR processors from their new 0-series ATmega range. As well as having more program memory and RAM than the Arduino Uno’s ATmega328P, the ATmega4809 has some interesting new features, including a 20MHz clock, an event system, and configurable custom logic.
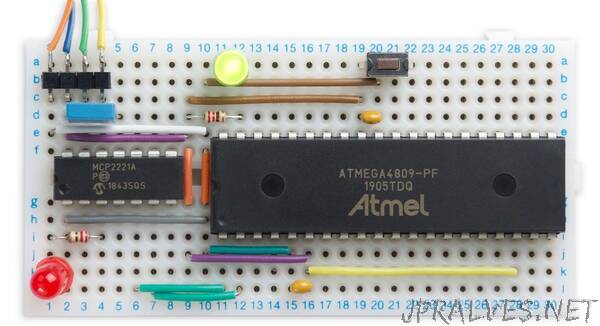
One of the attractions of the old ATmega328P was that it was available in a DIP package, making it ideal for prototyping. Microchip’s latest range of AVR processors aren’t available in DIP packages, with one exception: the ATmega4809 [4]. Coupled with their MCP2221 USB-to-serial chip, which is also available in a DIP package [5], you can make a complete microcontroller on a breadboard that connects straight to a USB port, and can be programmed from the Arduino IDE just like other Arduino boards.
The circuit
Although you can program an ATmega4809 chip directly, via UPDI, for developing programs it’s much more convenient to install a bootloader, and then program via the serial interface. This has the added benefit that you can use the Arduino Serial Monitor for reading input and printing out values while debugging.
I describe two alternatives here; using an FTDI USB-to-serial converter board, and using an MCP2221A USB-to-serial chip.”