
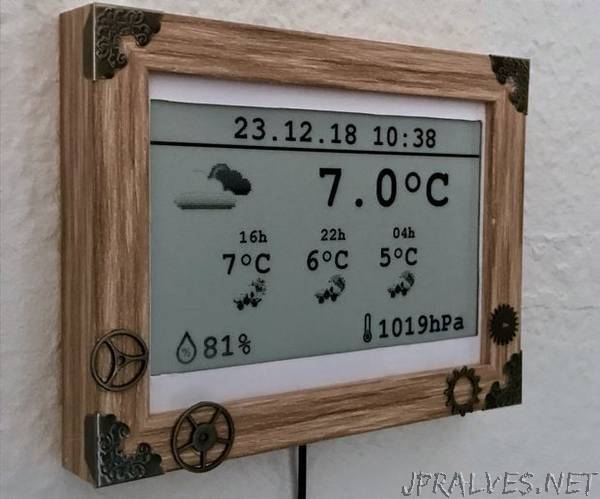
“I wanted to build a weather monitor on my own for a long time. When I saw the epaper displays from Waveshare I thought this would definitely be the way to go. This instructables describes how to build a weather monitor with an epaper screen and a Raspberry Pi Zero W underneath the hood. The weather data is gathered from Openweather.org.
For this project I used the following components:
1 Raspberry Pi Zero W for 17.76€ on Exptech.de
1 SanDisk Micro-SD card 16GB for 7.99€
1 Waveshare 7.5inch e-paper display for 47.11€ on Exptech.de
1 Waveshare Universal epaper panel driver hat for 6,75€ on Exptech.de
1 picture frame for 10cmx15cm pictures with 2cm depth to place the electronics inside
1 USB cable + USB power supply
some nice steampunk accessories like gears and tin corners from your local craft store
The overall cost should be around 85€.
Electronics
Putting the hardware together is pretty straight forward. The panel driver hat comes with female headers so you need to place male headers on the Raspberrys GPIOs before you can place the panel driver hat on it. Connect the panel driver hat to the e-paper display with the flat cable. Further instructions on installing the driver hat can be found on the Waveshare Wiki.
Picture frame
Use the glue gun to place your steampunk elements on your frame. After that take the cardboard and the cover out. You will need to adjust the size of the cover to fit the display. Use a pencil and a set square to draw the new borders. Cut out the new frame with a scalpel or a cutter. Use some sticky tape to place the display centric to the cover. Now put cover and display back inside the frame. Put the cardboard back in place and thread the flat connection cable between the cardboard and the wooden frame to the backside of the frame. At last add a deepening for the cable by using a grasper. Connect the USB cable with the Raspberry and fixate it in the deeping with hot glue.”