
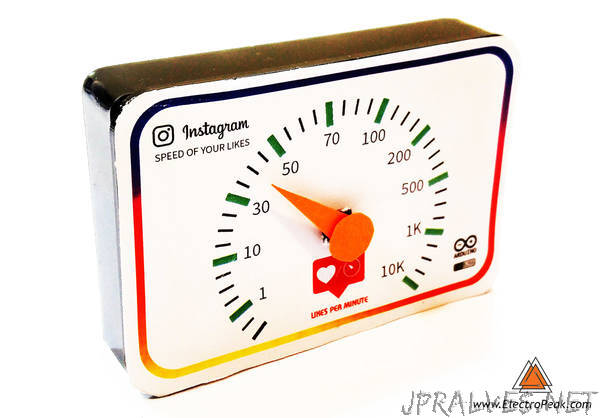
“It would fun to see how your Instagram posts perform in action! We are going to build a gauge that shows your Likes per minute speed. In this article, you will learn how to get data from web pages by ESP8266 and send them to Arduino to analyze and run other actuators. At the end of this article, you can :
Connect the ESP8266 to the internet and get data from web pages.
Use Arduino to read ESP8266 data and analyze them.
Get data from social media such as Instagram.
make a gadget that can show you the speed of Instagram’s likes.
An Introduction to ESP8266
Wireless interfacing, connecting to the web and remote controlling are features that can be very helpful in many projects. ESP-8266 is a low-cost microchip with full TCP/IP (Transmission Control Protocol and Internet Protocol), 32-bit MCU, 10-bit ADC and different interfaces like PWM, HSPI and I2C that enables microcontrollers to connect to the Wi-Fi networks. It is one of the best solutions for adding wifi to projects and (but not the only one.)
This microchip comes with different types of module like ESP-01, ESP-12 or other development boards and breakouts like NodeMCU devkit, Wemos and Adafruit Huzzah. The difference is their pins, components needed for easier usage and also price. The microchip has 32 pins that 16 pins of it are GPIO; depending on the model, the number of GPIOs provided is different. For ESP-01 it is just two pins but other models like breakouts have all of them. When using ESP-8266, you will need a serial interface to communicate and program. Simple modules usually don’t have serial converter (FTDI is usually suggested but other converters can be used, too) and it should be provided separately. Regulators, built-in LEDs, and pull-up or down resistors are other features that some models may have; the lowest cost between all of these modules is for ESP-01 and it’s our choice now.
ESP-01 is the first module that comes for esp-8266 and it has just two GPIO pin and needs 3.3V for power. It doesn’t have a regulator, so make sure to have a reliable power supply. It doesn’t have a converter, therefore you need USB to TTL convertor. Converter for this module (and also other models of ESP) should be in 3.3V mode. The reason for this is the convertor will make 0 and 1 via pulses, and voltage of these pulses should be recognizable for ESP, so check this before buying. Because of the limited quantity GPIO pins and also their low current (12mA per each one), we may need more pins or more current; so we can easily use Arduino with a module to access its IO pins (another way to access more GPIO pins is wiring out a very thin wire on the chip to the pin headers you need, but its not a good and safe solution). If you don’t want to use another board, you can design or use a circuit to increase current.
In this project, We want to connect ESP-01 to the Internet and get some data from Instagram pages. Then we send the data to Arduino and after processing it, Arduino changes the location of Servo pointer according to data. Let’s do it.”