
“The question you are probably asking is “why are you making another remote thermostat?”
The answer to that question is, I had to, and the market smart thermostats are too expensive.
Fair warning, this is “proof-of-concept” build that would require a few extra outputs to actually control your thermostat, but the core is in place and can be modified depending on your specific circumstance. Also, this is still a work in progress, so expect a few updates and changes (especially to the Matlab code)
To get started I want to warn you, this requires three programs (one of them is pretty expensive), quite a few libraries and support packages for the programs, and you need to have them all speak to each other. Its a headache. With that warning out of the way lets get started with the materials.
Hardware
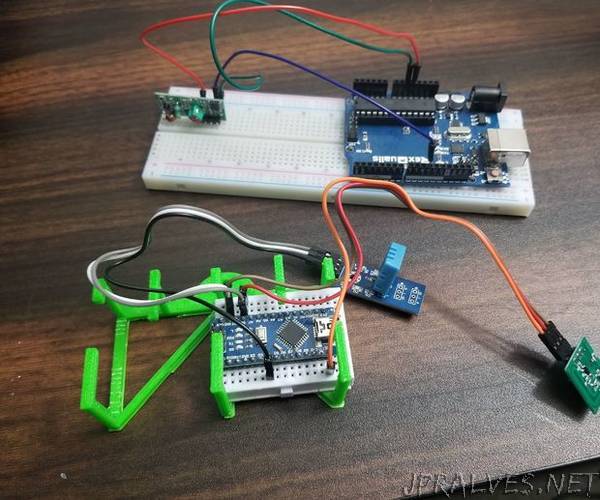
arduino nano
arduino uno (or another nano, I just used the uno because I had one laying around)
assorted jumper cables, some male/male and two sets of three joined male/female jumpers
433MHz radio frequency(RF) receiver, I used the MX-05V
433MHz RF transmitter, I used the MX-FS-03V
DHT11 high accuracy thermometer and humidity sensor (the one I used is installed on a three prong chip with the required resistors already installed)
breadboard (if you don’t want to solder this all together)
a phone with GPS (iPhone 8 in this case, but I’ve also used a Galaxy S8)
3D printed container (not really necessary, any container will work or none at all)
Software
Matlab from MathWorks (I have the 2018a edition, but I’ve used 2017a-b editions as well)
Matlab mobile installed on your phone
arduino support package for Matlab
iPhone sensor package for Matlab
arduino IDE
RadioHead support packages and libraries of the arduino IDE
DHT11 library for arduino IDE
python 3.7 (make sure the pyserial library or serial library is installed, which it should be for version 3.4 or newer)”