
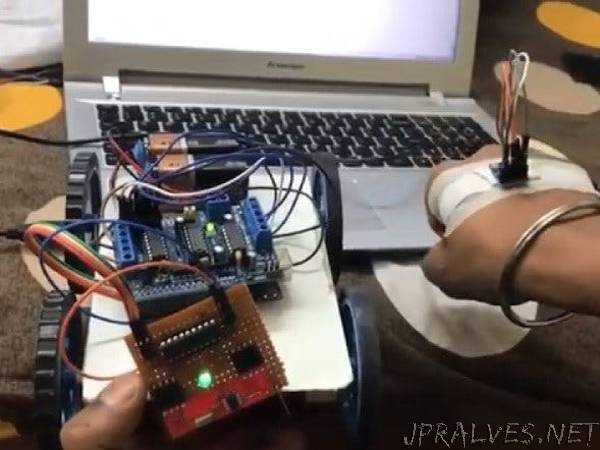
“This wirelessly controlled robot car uses gesture: tilt/orientation of hand to drive forward, backward, left or right.
The gesture control robot is one of the most common type of projects made by hobbyists and students to understand and implement micro-controller knowledge in a physical and practical project. The concept behind it is simple: the orientation of the palm controls the motion of the robot car. How does it do that, you ask? Let’s break it down.
To get a good understanding, we’ll move by understanding the role and function of each component and then combining them to achieve the desired performance.
1. ADXL335 (Accelerometer)
The function of the accelerometer is simple: to sense the orientation of the wrist. The accelerometer measures acceleration including the acceleration due to gravity ‘g’ as well. Thus we can use the accelerometer to sense the orientation of the wrist by measuring the component of ‘g’ in any particular axis of ADXL335 as shown in figure below:
Due to tilt of hand, the X and/or Y axis’ angle with vertical changes and hence a component of ‘g’ acceleration acts upon them as well which can be measured and thus indicates the orientation of the hand.
The ADXL335 can measure up to 3g of acceleration and is interfaced with Arduino by connecting it’s axis pins to Analog pins of Arduino. The accelerometer outputs voltage values proportional to acceleration.
In this project, Accelerometer is connected to Arduino Nano and is attached to the palm. The ADXL335 outputs voltage in range from 0 to Vcc (Applied voltage usually 3.3V) and is read by Arduino’s Analog pins. Thus for the user, we get a value in range from 0 to 1024 (10-bit ADC). The different orientation yields a different analog value for each axis which is then mapped to different robot movements.”