
“On a previous tutorial, we explored how to control a Raspberry Pi using Jupyter Notebook:
RPI PHYSICAL COMPUTING USING JUPYTER NOTEBOOK
It was a great experience, and once the project worked very well I thought, “how about to also test Jupyter Notebook on an ESP8266 (or even on ESP32) using MicroPython?”.
As we all know, the Jupyter Notebook is an open-source web application that allows you to create and share documents that contain live code, equations, visualizations and narrative text. Uses include data cleaning and transformation, numerical simulation, statistical modeling, data visualization, machine learning, and much more. For “much more”, we have also explored “Physical Computing”.
So far on my projects, I have mostly explored IoT and physical computing projects using ESP8266-01, 8266-12E (NodeMCU) and ESP32 programmed by an Arduino IDE, using its C/C++ type language. But another great tool to be used on programming those devices is MicroPython:
MicroPython is a lean and efficient implementation of the Python 3 programming language that includes a small subset of the Python standard library and is optimised to run on microcontrollers and in constrained environments. It aims to be as compatible with normal Python as possible to allow you to transfer code with ease from the desktop to a microcontroller or embedded system.Also, I think that using Jupyter Notebook to program an ESP device using MicroPython, can be a great tool to teach Physical Computing to kids and also help scientists to quickly access real-world playing with sensors on acquiring data.
This is what we will try to accomplish in this tutorial:
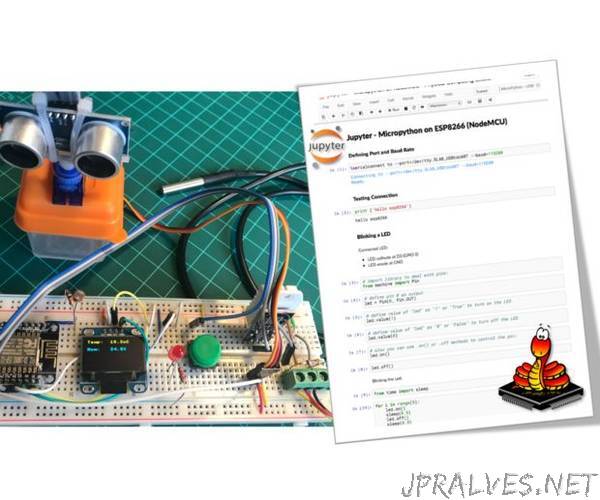
Output a digital signal to Turn On/Off a LED Read a digital input from a button Output a PWM signal to fade a LED Control a Servo Motor position using a PWM output Reading Analog signal (Luminosity using LDR ) Reading Temperature vai 1-Wire (DS18B20) Reading Temperature and Humidity (DHT22) Displaying data using an OLED via I2C bus.”