
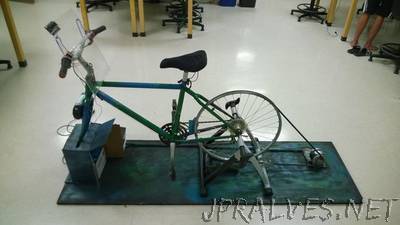
“Want to workout but your phone’s dead? With a stationary bike generator, that doesn’t have to be a problem. You can hop on your bike and watch your calories burn as you provide the energy to recharge your phone (or Laptop). This project is an extension of a long-term project at Pomona College to build a bike generator for the student body to use to charge their electronic devices off the grid. We received great inspiration and inherited many parts from out predecessors who produced this Instructable.
The general construction is as follows:When the user pedals, they spin the back wheel which spins a DC motor via fan belt. The motor’s leads are connected to a charge controller, which subsequently charges a lead-acid battery. The battery powers an inverter, which provides power to two 3-pronged outlets and two USB charging ports. We use an Arduino to turn on/off the charge controller and inverter as well as measure and display other diagnostic statistics of our bike generator on an LCD display.
Materials:
- Bike Frame w/ Back Wheel_
- Plywood/scrap wood/screws/bolts (for bike station)
- Bike Training Stand
- 24V Scooter Motor
- Fan Belt
- Fan Belt Pulley
- 12V Lead-Acid Battery
- DC-DC Battery Charger
- DC-AC Inverter w/ USB & Wall Outlets
- Arduino (We used a Leonardo but others will work)
- MOSFET
- LED & Photodiode
- Hall Effect Current Sensor
- LCD Screena
- ON/OFF Switch
- Relay, 5V Regulator, Diode, Buttons, Asst. Resistors
_This is a list of what used and is not meant to be an exhaustive list of what could or should be used. A lot of our decisions on electronics to use came down to what we had available (It wouldn’t have been such a green bike if we had tons of new fancy electronics shipped in). So don’t feel like you need everything on this list to make your own!”