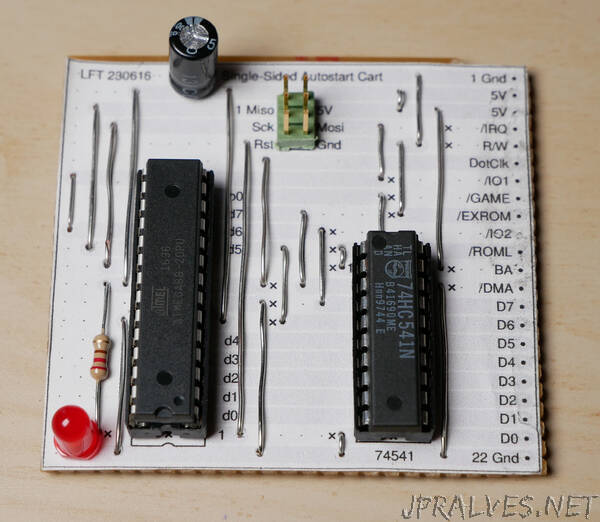
“In this article I’ll explain how to make a self-booting cartridge for the Commodore 64 using an 8-bit microcontroller on a stripboard.
Background
People ask me why the Commodordion boots from a tape drive emulator, which takes a couple of seconds and involves manual key presses. In contrast, an autostart cartridge on the expansion port would get everything up and running instantly at power-on.
In the particular case of the Commodordion, there’s a lack of space around the expansion ports. But in addition to that, the answer I usually give is that it’s much easier to implement a tape drive emulator than a cartridge. The communication protocol is slow and needs only a few wires, whereas a cartridge interfaces directly with the buses of the computer (via dozens of signals) and needs to respond in a fraction of a microsecond. And I knew I could build a tape drive emulator using components that I already had at home, whereas making my own cartridge would involve designing and ordering a custom PCB.
Or would it? The question kept itching at the back of my head. Wouldn’t it be a nice challenge to try to make an autostarting C64 cartridge on a humble stripboard?
The expansion port
The main difficulty is related to the shape and pinout of the C64 expansion port connector. This is a dual-row edge connector, and although it uses the same 0.1” spacing as a stripboard, signals are supposed to be routed on both sides of the cartridge PCB:
The stripboards (Veroboards) that I normally use when wiring up electronic projects by hand only have copper strips on one side:
But as always the C64 is eminently hackable. It turns out that all the signals we really need are on the same side of the connector, the top side. We have the power supply, the EXROM line that tells the computer that an 8 kB ROM cartridge is present, the ROML line that signals when the computer is trying to read from said 8 kB ROM, and the data bus (D0–D7) where the ROM will place its output. We don’t have access to the CPU clock, but we do get the dot clock which is eight times faster. But hang on a second! Don’t we need the address bus?
Principle of operation
Here’s the idea: Every time the C64 tries to access the cartridge ROM, the chip-select line, ROML, goes low for one CPU half-cycle (four dot clocks). The next half-cycle is reserved for the video chip which will never try to access cartridge ROM. So there will be one high-to-low transition of ROML for every byte the C64 fetches from the cartridge. At boot time, the C64 Kernal looks for a five-byte magic string (“CBM80”) in the ROM area, to see if an autostarting cartridge is present. We know exactly in what order these five bytes are read, so we can simply provide them one at a time whenever ROML goes low. If the five bytes match, the Kernal jumps through a vector in the ROM area, and again we can provide these bytes right when they are expected. Then we can proceed with opcodes and operands in a completely deterministic sequence.
There are two caveats: First, we can’t see the C64 reset line, so the autostart hack will only work immediately after power-on. Secondly, if the CPU is reading from cartridge ROM when the video chip stalls the CPU (on a so called badline), the CPU will keep reading the same address three times in a row. This will mess up the sequence. Therefore, as early as possible after power-on, we’ll send opcodes to turn off the display and disable all badlines.”
