
“Summer wildfire smoke has been a summer problem for a while where I live in the western United States, and has been particularly bad this year. The daily question was “How bad is the air outside?” Or inside, for that matter. There are several sources for air quality data, but there are no sensors close to where I live to tell me the local conditions. Last year, I tried to guess based on visible haze, but this proved to be woefully inadequate.
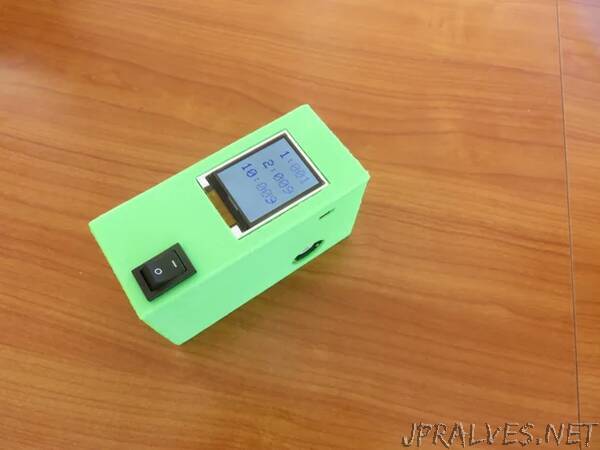
This Instructable describes the device I made to measure my local particulate matter pollution. It’s handheld and battery powered, so I can monitor either outside air, or the air inside the house. The device is also handy to take along if I’m traveling.
The device shows selected measurements on a 1.8” color display and will report the full set via serial port.
You will need the following components:
- Plantower PMS1003 particulate sensor
- Adafruit 1.8” Color TFT LCD Display with MicroSD Card Breakout - ST7735R. The same display can be purchased without being mounted on a PCB - half the price, but you have to do some fine soldering.
- Arduino Nano
- 60x40mm perfboard
- Various male headers for the PCB
- 1 female 1x6 cable connector
- 2 female 1x10 cable connector
- 1 SPST switch, such as https://www.amazon.com/dp/B07B9RPLZD
- 9V battery
- 9V battery connector
- A short piece of CAT5 cable, or 8 short thin wires to connect the display to the PCB.
- 2 60mm M3 screws
- 3 10mm M3 screws
- 2 M3 nuts
Tools:
- Basic tools for electronics, such as soldering iron, wire stripers, crimper etc.
- 3D printer to make the housing (optional, you can design and make your housing in some other way)
- Drill and a 7/64” or similar (3.75-3mm) drill bit.
- Computer with Arduino IDE installed.”