
“Before digital photography entered our lives and became ubiquitous, people had their photos printed on paper, and they made slide shows. From the 1950s through to the 1970s, boring friends and family with slides of vacations or weddings was an accepted pastime. There was no internet, people didn’t know any better.
Although we now have Facebook and Instagram to share family photos (I’ll leave it for you to decide if that is an improvement), the remnants of the Kodachrome era are still in a lot of people’s attics. Boxes full of 35 mm slides are still taking up space.
To remedy that, people buy a slide scanner, only to find out that scanning a big collection is a lot of work. That’s mainly because you need to manually put in the slides and scan them, one by one. One of my family members calculated it would take him at least 50 hours of mindnumbing labour to process the collection of 2.000 slides his father-in-law left him. Nobody wants that. There are companies of course that offer to digitalise all those boxes for you, but their services are far from cheap. Nobody wants that either.
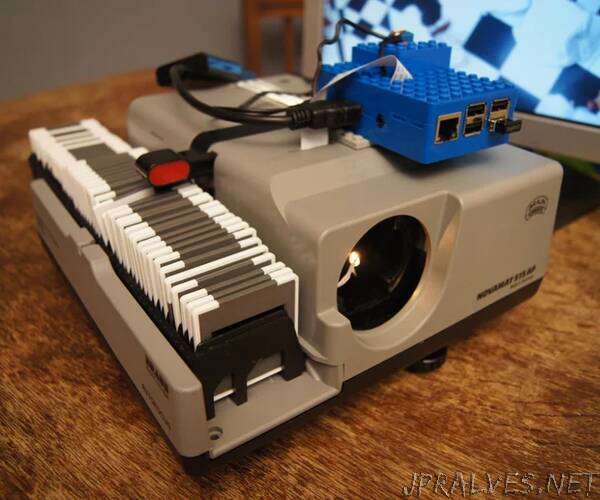
So why not hack an old slide projector and use a Raspberry Pi to turn it into a super-fast slide scanner? The Pi can switch slides automatically and store the images online in one go. It’s fast, cool, massively useful and you’ll reclaim all that space in the attic. Everybody wants that.
Note: this was a project I built and wrote about a couple of years ago. I didn’t publish the Instructable because I wanted to improve the scanner first, but I finally realized perfection should not get in the way of progress :-)
Here’s all you need to build your own automatic slide scanner:
An old slide projector
Raspberry Pi with SD memory card and power supply
Raspberry Pi Camera Module V2
TIP120-transistor and a 1 kilo-ohm resistor (both are dirt cheap)
Wire, breadboard, duct tape and/or a rubber band
Neutral Density (ND) gel sheet (buy it at Amazon or your local camera store)
A little soldering may be required, a multimeter will come in handy and you may want to order one or two 3D printed parts.
You’ll need an old slide projector. After I started the build, I found out that my projector had some impractical features. So I bought a new one, Voigtländer Spezial PM 35 A. 150 dollars on eBay, but I bought it for 17 euros in the thrift shop. I made sure it had these features:
autofocus
push button or remote control (so it needs a mechanism to automatically change slides)
easy to open
slide mechanism not incorporated in the case
made for universal slide trays
As a bonus its case is a cool-looking sturdy metal, and the slide mechanism works consists of sturdy metal push bars instead of loose plastic parts.
Older projectors look even nicer, but they don’t work with the universal trays.”