
“The subject of this blog is a build log, that will cover my build of a 3D printed hand wired 40% keyboard. It will include basic details on 3D printing, hand wiring, general assembly and software programming with QMK along with references to the guides I used.
About a month or so ago I was looking around for a new project (as I frequently do) and I stumbled upon a mechanical keyboard sub-reddit. This ended with me in fairly short order, purchasing the parts to build my first keyboard. Skip forward to today and I have just finished building my third full keyboard and three macro-boards. Clearly this hobby is going to be a money sink!
Required Hardware
The hardware you will require for this project is as follows
The required hardware list is a little more daunting than usual as it will require access to specialist equipment (a 3D printer). You could always buy a case and plate to use instead of printing one and then adjust accordingly.
A 3D printer with a build plate that is at least 220mm x 220mm, or alternatively buying a suitable keyboard plate and case.
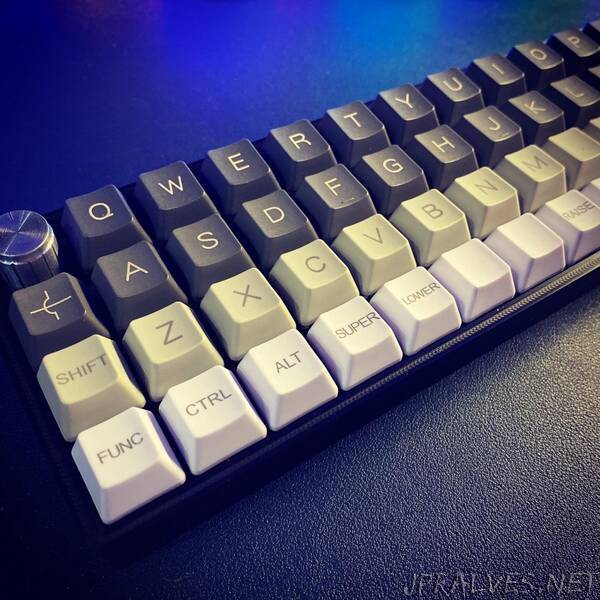
47 x MX type mechanical keyboard switches, I used Gateron Blues.
48 x 1N4148 diodes for the keyboard matrix.
A EC-11 rotary encoder, for the volume control.
A Pro Micro controller board.
6 x M3 6-10mm screws to hold the case together (assuming you are using the 3D printed one).
A suitable set of keycaps for a 40% ortholinear keyboard.
A grippy knob…
Suitable wire for building the keyboard matrix, I used a combination of old network cable wire (solid core) and some 26 AWG solid core cable I had from other projects. Any insulated wire will work but solid core is a little easier.
Line wire to go between the microcontroller and the keyboard matrix, you can use whatever wire you like but I highly recommend using ribbon cable as it is flat and easy to work with.
Soldering iron, snips, glue gun etc”