
“I’m bored. I’m sure you are too. I’m personally very thankful that I can still work through this strange period - but there are still hours in the day to fill. I wanted a personal project, so I thought about remote working and the health impacts. Most offices here have air handling units, air conditioners, and fans to keep air circulating. Most residential flats like the one I rent do not. Given I now spend close to 24 hours a day sat in this flat, air quality seems important. I looked up the cost of air quality meters and they’re either fairly pricy or fairly useless. I wanted one that I could graph over time. I decided to DIY one! This wasn’t intended to be a super serious project, just a bit of fun and an opportunity to learn more about embedded systems.
In the end, I built a little unit I think looks pretty nice given my limited DIY skills that:
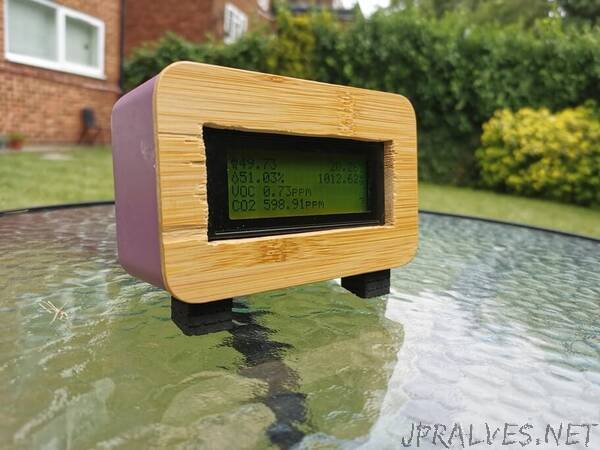
Displays realtime air quality data on a LCD
Reports realtime air quality data to a MQTT broker
Allows realtime monitoring on any device that can do MQTT.
I also involved a Raspberry Pi in this party that:
Persists data to an InfluxDB instance
Hosts a Grafana instance
Reboots occasionally and crashes if you look at it funny - just Raspberry Pi things.
The Parts
4MB Flash MIINI WEMOS D1 Lolin32 ESP32 Dev Board
I have worked with Arduino in the past - and have always found them to be a really fun tool to have in the arsenal. They’re cheap as hell and very useful in many electronics projects. I wanted something that was similar to work with in capability, but wanted more - namely I wanted to connect it to the internet! There are ways to connect an Arduino to the internet, but a far more seamless solution presented itself inside a gift my lovely fiance got for me a few months back - the Odroid Go! The Odroid Go is portable games console styled after the Gameboy and is capable of playing the games of many retro consoles. It also has a pretty prolific hacker community - since it is powered by a somewhat custom ESP32.
The ESP32 sounded incredible! two 240MHz cores + a third ‘low power’ core to keep things ticking while it’s asleep, 520KB of SRAM, WiFi, Bluetooth, 34 GPIO Pins, 12 bit ADC, SPI and I2C support - it really sounded like the perfect hacker board. Even the esp32 data-sheet does a good job of selling the applications of a solution like this, listing IoT Sensor Hub as its top application. Best of all, it’s unreasonably cheap! I picked up what I am pretty sure is a clone of another dev board manufactured by WEMOS from eBay for 7GBP delivered.
You can write code for the ESP32 in numerous ways - but the way that I was interested in was using the Arduino IDE - since I already had some experience with it in the past.
2004 I2C LCD Display
I wanted to have some sort of external display that would show the realtime values at all times. I considered going for a full colour display here, but decided that for simplicities sake I’d go for one of the old fashioned, text only ones that was probably intended to go into some industrial control hardware or a VCR. It also has the benefit of being fairly low power in comparison to a permanently backlit full colour TFT display.
The one I got has a lovely interface board already soldered on that allows you to talk to it using I2C - and also has a bright green backlight that my fiance has lovingly nicknamed the ‘Shrek’ lamp.
CJMCU-680 BME680 Module
This component it what sparked this whole project off. My phones assistant fairly regularly notifies me of Kickstarter or IndieGoGo projects that are fundraising - and this time the advertised product looked fairly interesting. It was the Metriful Sense board - an Indoor Environment Monitor board. It features a Light sensor, microphone, and the Bosch BME680. I was considering backing the Metriful Kickstarter and I’d encourage you to do so if this sounds good to you - however I decided I didn’t care about light and sound, didn’t want to wait months for it to shop, and only really cared about air quality, so I went to eBay and found that the BME680 is being sold on breakout boards for around 15GBP - shipped first class, so I got that instead. This component is actually the most expensive part of the build (I paid 16GBP) - but it is a pretty cool sensor.
The BME680 measures temperature, pressure, humidity, and gas resistance (how conductive the gas is) - and can offer you these values raw, or you can use a closed source Bosch library called BSEC which uses these 4 values and some magic sensor fusion tech to compute an Air Quality Index, as well as a guess at the Co2 and VOC concentrations in the room.
Enclosure
For an enclosure, I decided I wanted something fairly roomy - having been burned by trying to make miniature projects in the past. I wanted something that would fit the aesthetic of my flat, and something that was fairly easy to work with. I ended up settling on a plastic lunchbox which has a lovely wooden lid that press fits into the plastic from a shop called Flying Tiger. Really, any box that will fit the components and you can drill will work. I think it turned out pretty nice even with my absolutely terrible woodworking skills.
Battery Choices
I wanted to be able to transport this meter around the house and have it continuously measure for a period after it was unplugged. I wanted it to have reasonably good battery life. I also try to reuse things I have that would be ‘e-waste’ otherwise and I settled on a 3000mAh 18650 battery that I had lying around that was in use for a high current application prior, but now had developed too high of an internal resistance to really push amps. Perfect for this project then, since the entire project will sip around 80mA in its completely unoptimised form, and this could easily be significantly reduced. In reality, the battery lasts around 30 hours. All I needed to purchase here was an 18650 holder.
Raspberry Pi or other server you control
The ESP32 is a very powerful dev board, but in order to persist large amounts of data and to make it accessible in something like Grafana we’re going to need something a bit more powerful! I had a Raspberry Pi 3b+ sitting in the ‘one day I’ll find a use for you’ box I have and decided this was a perfect use. It can be my MQTT broker. It can even perform double duty and host Grafana for me. I did consider hosting all of this on the server that hosts this very website (A Scaleway instance) - but didn’t want to pollute that environment too much if I ended up getting bored of this project.
I’d like to stress here something that I learned the hard way - a good quality power supply is an absolute requirement for any Raspberry Pi. Lower quality power supplies just aren’t beefy enough to really supply the Pi when things really get going and you’ll find yourself chasing ghosts. Get a decent power supply!
The Build
I2C Components
I’ll provide a quick and dirty primer on I2C: It’s a way of attaching peripherals to microprocessors over short distances. It’s pretty slow topping out at 5 Mbps - but is nice since it has extremely simple wiring (just 2 data wires!) and you can chain devices. Effectively, we just need to connect the SDA and SCL pins (along with power) between the components and the esp32 and the hardware portion is finished. When we want to connect two devices, we just connect all 3 in a chain (connect all the SDAs together, connect all the SCLs together). The only other thing we realistically need to take into account is the address. Each I2C Peripheral will have an address that identifies it on the bus. These addresses are not unique. If you purchase two of the same peripheral, you’ll probably find they have the same address in their default configuration. This means that you cannot ‘talk’ to each device independently if they’re on the same bus. There are a couple of solutions to this problem: the simplest being peripherals that feature an ‘address select’ jumper which will allow you to select a secondary address to use instead of the first, and other peripherals will be reprogrammable so you can change the address freely. YMMV.
So, to connect our I2C components up, just connect all the SDAs together, and all the SCLs together. Pretty simple!”