
“Security cameras seem to be have gotten pretty popular in the last couple of months. I thought I’d share how I put together one using a Raspberry Pi Zero W and some additional components.
The device has the following features:
Powered by rechargeable battery. Battery charges via USB.
Motion activated video (and photo) recording.
IR LED equipped (night vision recording).
Media saved locally (Raspberry Pi SD card), no need for Cloud storage or internet connection.
If device is within reach of a WiFi network, it can connect to it and can be controlled through its web interface.
Sends a notification to your phone and then shuts itself down when the battery is below a safe level.
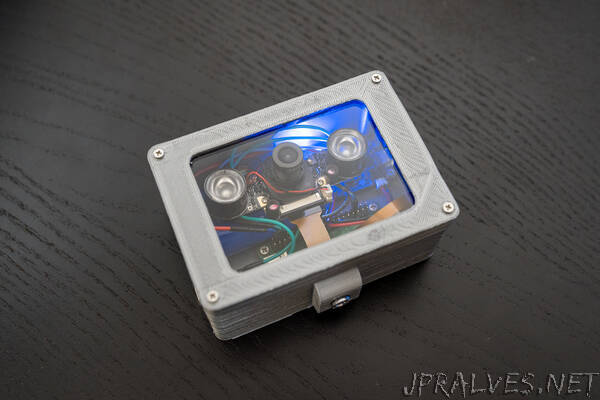
3D printed case with standard tripod connector.
Hardware Setup
Here are the components used on this project:
Raspberry Pi Zero W.
Raspberry Pi Camera.
Adafruit Power Boost 1000C.
4400 mAh Li-Ion battery.
Latching push button switch.
3/8 inch tripod adapter.
ABS filament for 3d printed case.
Acrylic sheet.
22-gauge wires for connections between components.
The reason I went with the camera listed above instead of the official one is because the Raspberry foundation doesn’t offer a dual camera (i.e. night vision and daylight), you have to choose which one of those modes you will be using and get the corresponding camera. Since I wanted to use the device in both modes, I got an aftermarket product.
There are many models of these cameras offered online. Be careful with the one you get as not all of them can switch modes automatically (I’ve linked the exact model I bought above). Once you get the camera, you’ll have to calibrate it as settings are all over the place from factory. They don’t come with instructions on how to do that, so before I go through the calibration steps, let’s go over how the day/night mode shift works.
The way these cameras switch modes automatically is by utilizing a photo cell to switch an internal infrared (IR) filter on and off when the light level gets either high or low enough. We want the big Infrared (IR) LEDs turned on during night mode only, so that they don’t drain the battery. The high/low light threshold is set by two variable resistors which are very small screw-looking pieces located next to the photo cells. Thus, the calibration process is as follows:
Dim down the lights in your room to the point where the night mode should kick in (or just turn off the lights if you want the night mode to kick in in almost complete darkness).
Rotate one of the variable resistors back and forward using a small eyeglass screwdriver until the IR LED turns on (if it’s dark enough, you’ll notice a very dim red light coming out of the IR LED).
Repeat the previous step for the other IR LED’s variable resistor.
It may take a while to set it up as the device is super sensitive, but once done, you’d be done with hardest part of this project.”