
“This project was done as part of our project week at University of Applied Sciences Osnabrueck. It was inspired by already available Instructables like:
Arcade Spielekonsole Mit Raspberry Pi
Barcade Arcade for all
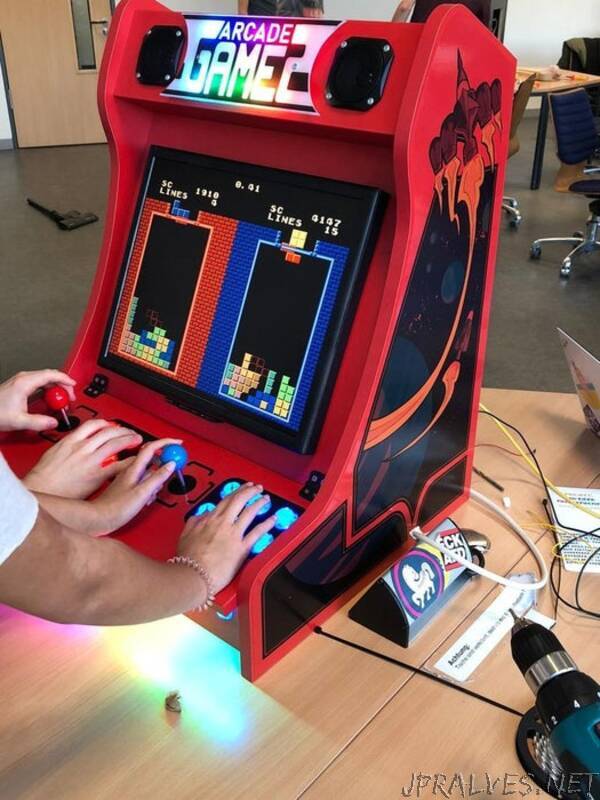
Except having an arcade machine after finishing this project, you will also have a machine, that is able to stream Youtube videos, show pictures or play music from a NAS or harddrive/USB.
Sixteen People worked in a team together to finalize the arcade machine within a time range of five days. Due to the amount of members in the group it was possible to allocate the different steps of building the machine in order to work more efficiently.
Supplies:
For the case:
Tools: Hammer, saw, cordless screwdriver, drill set, angled drill
Optional (if you want led’s): soldering iron, wires (choose size based on number of led’s), powersupply for leds/arduino (if its not already included in your led set)
Materials: wood (for exact measurement, see step 2), a bag of screws and screw spaceholders, 1mm spaceholders (2x), hinge (2x)
For the electronics:
Raspberry Pi3b+ and powersupply (optional: case / recommended: cooling kit for RPi3b+)
SD-Card (google recommended sd-cards for RPi or pick the one we used)
Audio amplifier, speaker and any powersupply from 12-24V DC (also some speaker wires and a audiocable 3.5mm to cinch)
Joystick and button set
A monitor or old screen (should support HDMI or you will need a HDMI - VGA adapter). You just need to make sure, that the screen will fit on the front of the machine (see step 2 for sizes).
Optional: speaker mesh, RGB led strip (optional: led strip with ws2812b chips and a Arduino for individual led control).
You will also need: Mouse/Keyboard for initial config of the RPi.”