
“Have you ever wanted to build a LED matrix display using hand-crafting methods, such as sewing, weaving, or papercraft? Designing and fabricating complex LED projects by hand, while making use of limited input-output (i/o) pins on microcontrollers/Arduino, is challenging. Previous posts have covered how to organize LED matrix displays using “Charlieplexing”, which simplifies printed circuit board (PCB) assembly and makes efficient use of i/o pins. But, what if we don’t want to go through the hassle of ordering a custom PCB, or what if we want to work with individual LEDs in a craft project? Cost is also a factor: a cardstock “papercraft” display could be built from a cheap Arduino-compatible board and bulk LEDs for under $5 on Ebay, far cheaper than even the cheapest LED scrolling marquees.
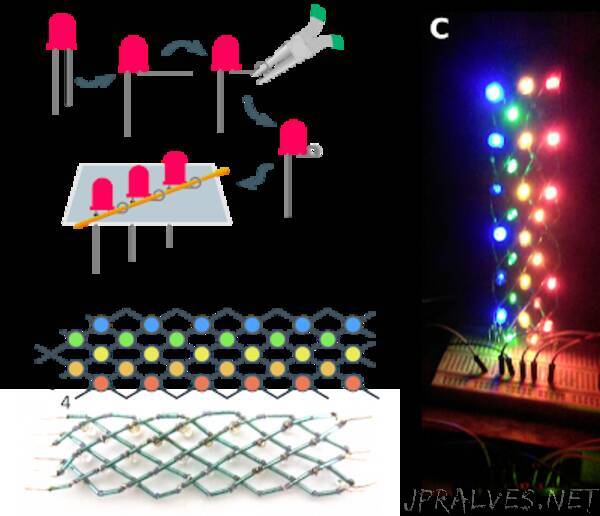
For a brief review, LED multiplexing involves attaching multiple LEDs sharing a common anode (+ side) or cathode (- side) arrangement. Only one row or column is active at a time, and rows/columns are scanned rapidly so that all lights may appear to be on. Carlieplexing is similar, but uses the same set of microcontroller pins for the anodes and the cathodes. Grid locations where the anode and cathode are now the same pin are excluded (blacked out LEDs, right, below). A previous post covered how to make the best use of the layout space for Charlieplexing LED matrices. For hand-crafted projects, we’d like a way to build multiplexed layouts as simply as possible, without extra “wires” tracing throughout the project. This can be done by using a diagonal slice of the Charlieplexing grid layout, which allows the driving lines to wrap around the edges of the project:”