
“Using two LDRs to get intensities in two direction and then comparing those intensities will rotate the servo motor.
Story
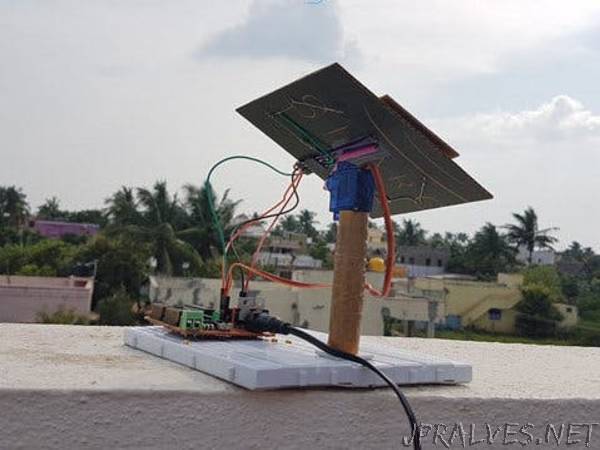
NodeMCU based project : Rotating Solar Panel
In this project, we will see a simple Sun Tracking Solar Panel circuit which will track the Sun and position the solar panels accordingly.
Introduction
As the non renewable energy resources are decreasing, use of renewable resources for producing electricity is increasing. Solar panels are becoming more popular day by day.
Solar panel absorbs the energy from the Sun, converts it into electrical energy and stores the energy in a battery.
This energy can be utilized when required or can be used as a direct alternative to the grid supply. Utilization of the energy stored in batteries is mentioned in below given applications.
The position of the Sun with respect to the solar panel is not fixed due to the rotation of the Earth. For an efficient usage of the solar energy, the Solar panels should absorb energy to a maximum extent.
This can be done only if the panels are continuously placed towards the direction of the Sun. So, solar panel should continuously rotate in the direction of Sun. This article describes about circuit that rotates solar panel.
Principle of Sun Tracking Solar Panel
The Sun tracking solar panel consists of two LDRs, solar panel and a servo motor and NodeMCU.
Two light dependent resistors are arranged on the edges of the solar panel. Light dependent resistors produce low resistance when light falls on them. The servo motor connected to the panel rotates the panel in the direction of Sun. Panel is arranged in such a way that light on two LDRs is compared and panel is rotated towards LDR which have high intensity i.e. low resistance compared to other. Servo motor rotates the panel at certain angle.
When the intensity of the light falling on right LDR is more, panel slowly moves towards right and if intensity on the left LDR is more, panel slowly moves towards left. In the noon time, Sun is ahead and intensity of light on both the panels is same. In such cases, panel is constant and there is no rotation.
before starting make sure, you have
1. installed the arduino ide in your system (and check for com port for nodeMCU)
2. register yourself at http://thingsai.io/
3. create and configure a new project
Setting Up Cloud Account on ThingsIO.AI
ThingsIO.AI is a IoT platform for developers. As a developer we understood the pain of not having a seamless place to connect, analyze and process device data. Many pure analytics platforms does not offer device management, which is core for the iot. That is the reason for ThingsIO.AI.
Register the account in http://thingsai.io/
You will get the notification for sign up.
Go in your email address and verify your account.
After that, sign in your account with your email address and password
Now, you will be on the project dashboard. Click on the new project option.
Click on the add a new device option. you will get device ID.
Enter the device name and click on the create and configure device.
You will be on your device dashboard.
Some basic points(1-5) for analysing data on ThingsIO.AI
1. Track your device’s special parameters here. This can be set in device configuration(default to null).
2. You can see your real time and special parameter’s graph.
3. You can see your all data points.
4. You can see here your last 5 data points.
5. You can see here all the list of created graphs.
Go in sample device code options and click on the NodeMCU.
You will get the sample code from there copy and paste into your Arduino IDE.
Click on the “Send trial data” to send a trial data to the server:
make connections as instructed in schematic diagram for LDR and relay to nodeMCU. which is again shown below,”