
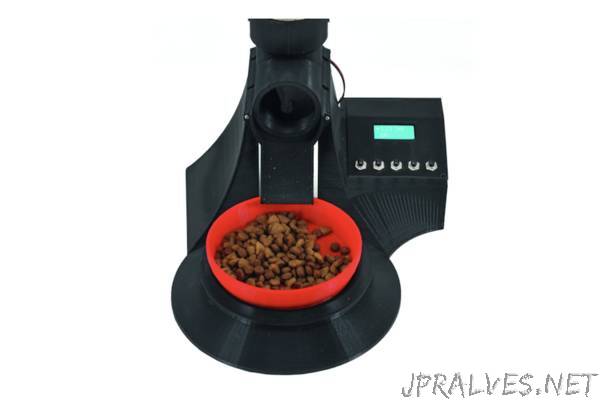
“It automatically supplies meals to your pet at preset times, by providing the daily dose of cat kibble.
Having a pet involves big responsibilities, first of all granting them food; unfortunately, a hectic lifestyle and imposed workhours do not go hand-in-hand with the needs of our four-legged friends, and surely anyone living on their own will have a hard time providing the pets meals on schedule. In order to solve a problem that is surely dear to any pet owner, and especially cat and dog owners, we have designed a device we called FelixMatic: it is a practical automatic dispenser of dry food for cats (or small dogs) equipped with a high-capacity container that can easily be opened from the top and a bowl to collect the kibble when it is supplied. We know we can already find automatic dispensers on the market, however, our example is unique because it can be programmed with 9 meals a day in order to supply very precise quantities of dry food.
The project
The way the dispenser works is more complex and complete than the average available product on the market, in fact, it does not only supply food but it also gives exact doses as decided by us; basically, at a preset time, a cochlea at the base of the container will turn, and drop a certain amount of kibble in the bowl, regulated by a dedicated weight sensor.
In order to have this kind of functioning, our dispenser is composed of a mechanical and an electronic section; the former has been assembled with PLA, 3-D printed parts, while the electronic section is composed of an Arduino UNO board to which we have applied an RTC Shield, a specific shield with an LCD display, a model-making continuous rotation servo and a load cell; the latter is used to weigh the amount of dry food, and once we reach the desired quantity, the servo operating the cochlea stops. The LCD monitor is managed through pins 8, 3, 5, 6, 7 of the Arduino board; instead, the load cell is read through the A0 pin and it provides an analogue signal itself. For simplicity of design, we decided to use a shield dedicated to measurements and weight display, interfacing with Arduino UNO rev.3 as indicated and connected to the load cell. The shield, called Weight Shield, mounts an eight-character, 2-line LCD display, which is used, in our project, for setting up the machine. Besides the display, we have the INA125 integrated, a high precision amplifier developed specifically for measurement instruments such as scales. We are going to solder the keys connection on this shield, which will follow the wiring diagram proposed on these pages (Fig. 1), showing the connections to the load cell (we have included a terminal block for those).
As you can see, the five keys, which are normally open, must be connected to the common ground, to a scale of resistors, since we are going to read them using the A/D converter in order to save Arduino’s lines; basically the multiple dividers, powered by Arduino’s 5 V, outputs 8 V on the A2 analogue line which depends on the key pressed, to wit:”