
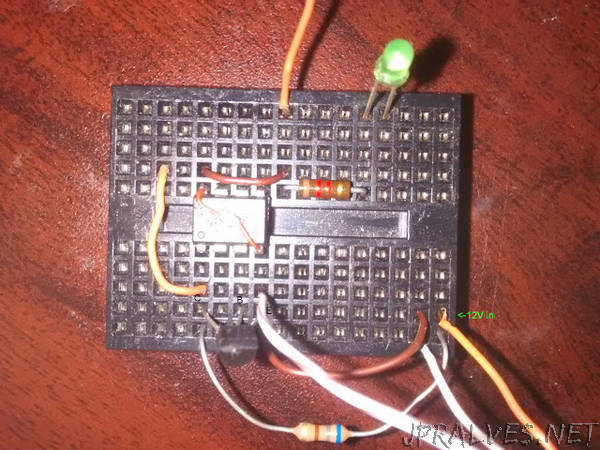
“Although I’ve been working with AVR MCUs for a number of years now, I had never made a high voltage programmer. I’ve seen some HVSP fuse resetter projects I liked, but I don’t have a tiny2313. I think I was also hesitant to hook up 12V to an AVR, since I had fried my first ATMega328 Pro Mini by accidentally connecting a 12V source to VCC. However, if you want to be an expert AVR hacker, you’ll have to tackle high-voltage programming. Harking back to my Piggy-Prog project, I realized I could do something similar for a fuse resetter, which would simplify the wiring and reduce the parts count.
I considered using a charge pump to provide 12V, like some other HVSP projects do, but adding at least 3 diodes and capacitors would more than double the parts count. I also realized that most AVR hackers probably have a 12V power source available. Old ATX power supplies have 12V on the 3.5” floppy connector, which 0.1” pin headers easily plug into. Old DSL modems and home routers often run from a 12V DC supply. I decided to use a 14.4V tool battery with a small switching converter. I even thought of using one of my TL431s, but hooking up a few alligator clips to the switching converter was quicker.
Instead of just copying another program verbatim, I decided to implement the core of the programming algorithm myself. The AVR datasheets list two algorithms, though all of the HVSP programs I could find followed the first algorithm and not the alternative one. Both algorithms are somewhat obtuse, and even seem to contradict the datasheet specifications that state the minimum latching time for Prog_enable is only 100ns.
After debugging with my oscilloscope on a tiny13 and a tiny85, I realized that the two parts have different ways of entering HVSP mode. The tiny13 will enter programming mode when it powers up and finds 12V on the reset pin, while the tiny85 requires the reset pin to be at 0V on power-up before applying 12V. Although the datasheet doesn’t explicitly state it, the target drives SDO high when it has entered HSVP mode and is ready for commands. In the case of the tiny85, that happens about 300us after applying 12V to the reset pin. However with the tiny13, that happens much sooner, around 10us. This means the datasheet’s recommendation to hold SDO low for at least 10us 12V has been applied is not only wrong, it’s potentially damaging. During my experimenting, I observed my tiny13 attempting to drive SDO high while the programmer was still holding it low. That caused VCC to drop from 5V to 4V, likely approaching the 40mA maximum I/O current maximum. And since the datasheet specifies a minimum VCC of 4.5V for HSVP, the droop to 4V could cause programming errors. In the scope image, the yellow line is VCC, and the blue line is SDO.
Instead of waiting 300us after applying 12V to send any commands, I considered just waiting for SDO to go high. While this would work fine for the ATtiny13 and ATtiny85, it’s possible some other parts drive SDO high before they are ready to accept commands. Therefore I decided to stick with the 300us wait. To avoid the contention on SDO shown in the scope image above, I switch SDO to input immediately after applying 12V. Since it is grounded up to that point removing any charge on the pin, it’s not going to float high once it is switched to input.
Another source of potential problems with other HSVP projects is the size of the resistor on the 12V reset pullup. I measured as much as 1mA of current through reset pin on a tiny13 when 12V was applied, so using a 1K resistor risks having the voltage drop below the 11.5V minimum required for programming.”