
“If you’re looking for a tool for measuring frequency that is not the classic multimeter and, in the various drawers of your lab, between a forgotten board and various devices, you can’t find one, worry not: you don’t have to spend a fortune in professional tools, because we have you covered, creating the project you can find in these pages. It is a bivalent tool, since it both acts as frequency meter and clock generator, very useful in this era where logics and digital devices are extremely commonplace. You can surely find ready-to-use tools on the market, however it makes sense to create our own: it is not based on the classic integrated circuits, oscillators, counters or microcontrollers, but on an FPGA (Field Programmable Gate Array).
And a programmable logics is also what is at the base of the Led Matrix controller board that we have proposed in the “big modular display” project presented in this post, where we stated that the same board could be reconfigured to carry out many other tasks, including a frequency meter, given the availability of BNC connections and the hardware support for frequencies revolving around 400 MHz.
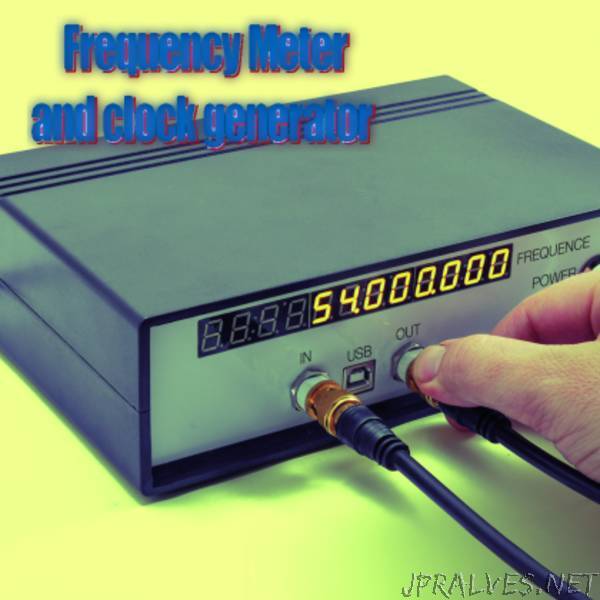
Ipso facto! We turned the Led Matrix controller in a bona fide 2-in-1 lab tool: a frequency meter and clock generator. Thanks to the re-programmability of a FPGA-based system, we can develop a new project that has nothing to do with the previous one except for the fact that both share the same development board. In this case, however, the Spartan 6 FPGA will control a second board with a 12 digit display that will display the frequency value of the input signal to be measured.
The block diagram of the two boards that will be connected together through two flat cables is shown in figure. The FPGA that you can see at the center takes as input the signal to measure through the BNC (CN7) connector and generate the control signals for the 12 digit display. A second BNC (CN8) is used to generate a general-purpose clock. The Led Matrix controller board also have auxiliary components: the 27 MHz input clock as reference to synchronize the internal logics of the FPGA, a USB port that is needed to program the PROM flash memory through bootloader (which can contain up to 15 configuration images for the FPGA) and, finally, a DIP switch (DSW1) that we are going to use ask clock frequency selector provided on the tool’s output.”