
“Solve real-world electronic and engineering problems with your Raspberry Pi and the help of renowned technology hacker and author, Simon Monk
This is a very simple project to make. In fact, all you really need to do is plug the Sense or Unicorn HAT onto the Raspberry Pi’s GPIO header and install the software.
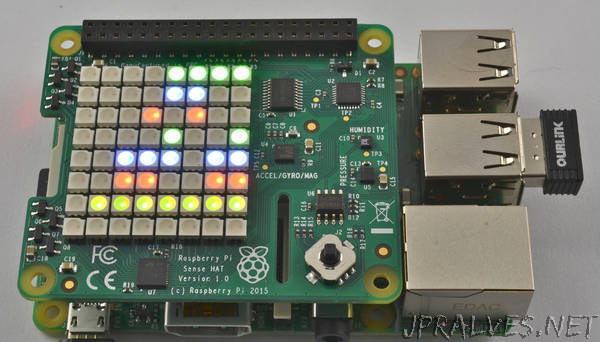
This project displays the current time in binary. The rows of the display are (from top to bottom) the last two digits of the year (e.g. 15), the month number, the day of the month, the hour (24-hour format), the minute, the second, and finally hundredths of a second.
The full article can be found in The MagPi 42 and was written by Simon Monk
You’ll Need
Raspberry Pi with 40-pin GPIO header (A+, B+, 2 and 3)
Sense HAT or Pimoroni Unicorn HAT
USB WiFi adaptor or Ethernet connection
Reading the binary clock
To read a binary clock, you either need to be good at recognising binary numbers or use a bit of arithmetic to calculate the time, by adding up the binary digit values for the LEDs that are lit on a particular row.
For example, the first row displays the year in two-digit format. So, if LEDs at positions 8, 4, 2, and 1 are all lit, then the year is 8+4+2+1 = 15. In 2016, just the digit position 16 will be lit.
The colours of the LEDs have no significance – they are different to make the display more interesting.”