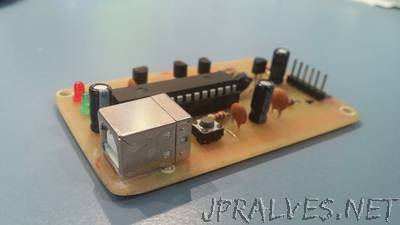
“Hi! This is a short Instructable on making a PIC programmer which acts as a PicKit 2. I made this because it is way cheaper than buying an original PicKit and because Microchip, the manufacturers of PIC microcontrollers and the PicKit programmer, provides schematics and software, making it really easy for us to design our own programmers, definitely an advantage of using PICs.
Tools Needed:
Soldering Iron and solder
Wire Snips
Needle Nose Pliers
PCB etching tools and materials - Can be replaced with a breadboard but will take up more space
Already working programmer (This is the downside, maybe you can borrow one)
PC (for programming the PIC that goes into the PicKit)
Materials Needed:
2 x 100nF ceramic capacitor
2 x 15pF ceramic capacitor
2 x 47uF 16v electrolytic capacitor
1 x 10uF 16v electrolytic capacitor
2 x 1N4148 diode
1 x PIC18F2550
1 x 28 pin thin IC socket (for the PIC18F2550)
1 x 680uH inductor, resistor-like package
2 x 3mm LED (one green and one red)
3 x BC548 transistor
1 x BC557 transistor
1 x 20MHz oscilator crystal
3 x 33 ohm resistor
1 x 100 ohm resistor
2 x 330 ohm resistor
1 x 1k resistor
1 x 2k7 resistor
2 x 4k7 resistor
3 x 10k resistor
1 x 100k resistor
1 x 2-pin tactile switch (button)
1 x pin strip (only 6 needed)”
