
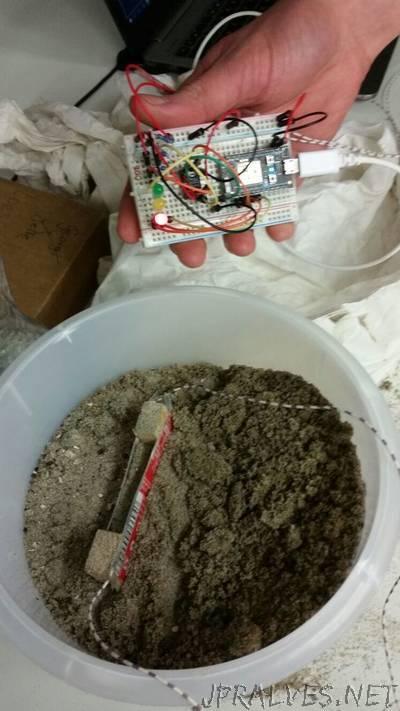
“This instructable describes how you can build your own soil moisture sensor. There are a lot of instructables online about soil moisture sensors, but not that much about a self-made capacitor for measuring soil moisture content. With the simple resistance measuring, the biggest issue is the corrosion of the metal sensor, not just because it contacts the wet soil, but also because of the electric current which causes electrolysis of the sensor. Feeding the sensor with an AC or a pulsating DC may fix this problem for a little, but we prefer to make a capacitor as a soil moisture sensor. There are some advantages to a capacitor. You avoid corrosion , but capacitive measuring also gives a better reading of the moisture content of the soil in comparison with the resistance measurement. The electrical conductivity of the soil is increased by salts, so fertilizers added to the ground may result in incorrect readings. The capacitor that we build will measure the time that is necessary to charge the sensor. The charging time will increase if either the resistance or the capacity increases. The resistance is constant and the capacitance increases if there is water between(or around) the sensor, because the relative permittivity of the dielectric material increases.”