
“How to use the AVR64DD32’s asynchronous counter to measure frequencies beyond 100 MHz
Modern AVR microcontrollers have asynchronous counters that can be externally driven to count pulses from 1 Hz to beyond 100 MHz. Over the years I’ve explored various methods for building frequency counters typically using the SN74LV8154 32-bit counter, but my new favorite method uses the AVR64DD32 microcontroller ($1.52 on Mouser) to directly measure a signal and report its frequency to a PC using a USB serial adapter. I’m working on a special frequency counter project which builds upon this strategy, but I found the core concept to be interesting enough that I decided to write about it in its own article. The following information is a summary of how the strategy can be achieved, but additional information and source code is available on GitHub.
Theory of Operation
- Count frequency on an input pin
- Connect the signal to be measured to the EXTCLK pin1
- Setup the 12-bit Timer/Counter D to asynchronously count EXTCLK pulses
- Use an overflow interrupt to track total pulse count
- Gate the counter to report frequency exactly once per second
- Setup the 16-bit Timer/Counter A to interrupt 5 times per second
- Divide-down the 24 MHz system clock to achieve 5 Hz
- Alternatively divide-down a 10 MHz reference on the XTAL32K1 pin2 to 5 Hz
- On every 5th interrupt, display the measured frequency
1 - The AVR64DD32 datasheet suggests EXTCLK can be driven via XTALHF1 pin to a maximum frequency of 32 MHz (Section 12.3.4.2.1, page 93), but this article by sm6vfz demonstrates this strategy produces results accurate to the single Hz up to 150 MHz.
2 - The AVR64DD32 datasheet says “an external digital clock can be connected to the XTAL32K1 pin” (section 26.3, page 344) but my read doesn’t clearly indicate what the upper limit of the frequency is that may be clocked in. Although the XTAL32K1 pin in combination with XTAL32K2 are designed for a 32 kHz crystal oscillator, my read does not indicate that 32 kHz is intended to be an upper limit of what may be clocked in externally.
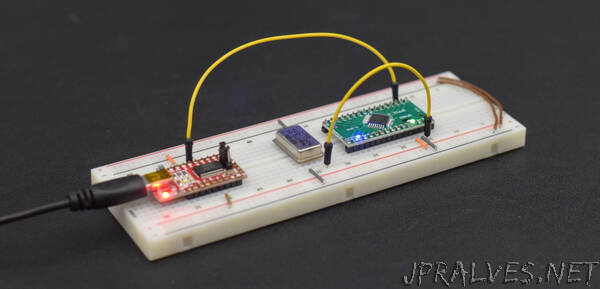
Basic Setup
Microcontroller: The AD64DD32 8-bit AVR does not come in a DIP package, but the VQFN32 package is easy to hand solder to a QFN32/DIP breakout board. It also cannot be programmed with a ICSP programmer, but instead requires a UDPI programmer. See my Programming Modern AVR Microcontrollers article for more information about programming these chips.
Code: Full source code for this project is on GitHub, and the code highlights are shown at the bottom of this article.
PC Connection: I’m using an RS232 breakout board as a USB/serial adapter. It’s Rx pin is connected to the microcontroller’s Tx pin (pin 2).
Test Signal: I’m using a 50 MHz can oscillator as a test signal. It’s been in my junk box for years and it doesn’t surprise me if it has drifted a few kHz from 50 MHz. Note too that there may be some inaccuracy in the gating time base due to the imprecise nature of the AVR’s 24 MHz internal oscillator.”