
“Controlling a robotic arm to pick up and drop objects is difficult enough, without IoT it would be near impossible to do this remotely.
Story
Introduction
I really wanted to try was designing a robotic arm completely from scratch. There are many open-source designs available, but I thought it would be gratifying if I could design, build, and program one from nothing (and it was).
I will talk about both the design and programming phases. But I will focus more on the programming side since it is not just controlling servo angles.
Here is a link to video of final project in action - https://www.mathworks.com/videos/how-to-control-a-robotic-arm-from-a-remote-location-using-iot-1538564659095.html.
I used Simulink to program an Arduino MKR1000 which is the MCU controlling the robotic arm. I then added the ability to control the robot arm from practically anywhere through ThingSpeak, an open IoT platform with MATLAB analytics.
Hardware Needed
15” x 20” 1/8-inch plywood
Arduino MKR1000
5x GS9025MG servo
2.1mm breadboard friendly DC barrel jack
6 V DC barrel jack power supply
Jumper wires
3x 2n2222a Transistors
10x M2 nuts
10x M2 x 10 screws
40x M3 nuts
40x M3 x 25 screws
Software used
MATLAB
Simulink
MATLAB Support package for Arduino hardware
Simulink Support package for Arduino hardware
MATLAB Support package for ThingSpeak
Design
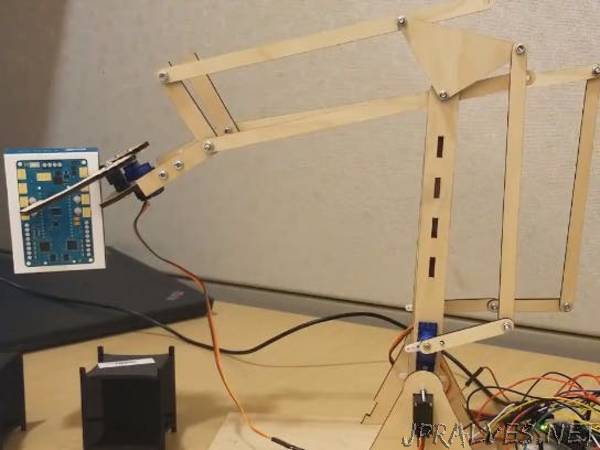
I wanted to keep the cost of parts low, so I designed this for hobby servos, specifically the GS-9025MG model. This meant that the final weight and size was limited. This was because micro servos could not exert much torque, and as a result, cannot lift heavy lever arms.
I tried prototyping with 1/4 inch plywood, which proved to be too heavy for the servos. I reduced the length of the arms and used 1/8 inch plywood, and that fixed the servo control issue. I drew up the design using Fusion 360, and downloaded the design as a.dxf file, which I then laser cut.
Also, supplying continuous DC voltage from a wall outlet proved necessary because the current drawn from battery packs was very high and drained them very quickly.
Regarding controlling the motors, the Arduino MKR1000 has 4 PWM pins, but I needed 5 to control the 5 servos. I got creative and used one PWM pin to control 2 servos and a digital pin to toggle between the two servos and control one at a time.”