
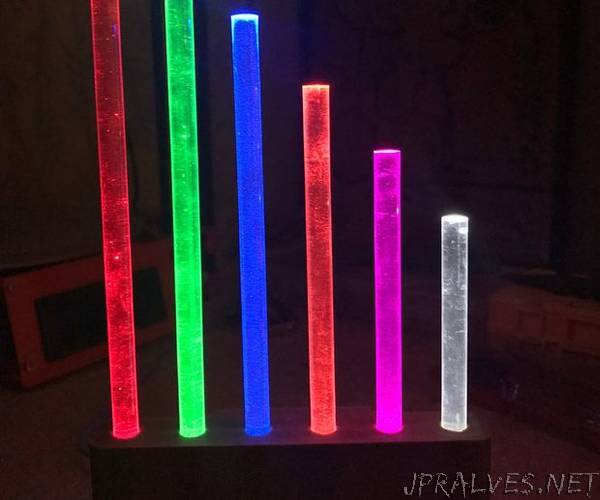
“The first revision of the lamp was made as a christmas gift for a friend, and after gifting it the design was revised and improved, as well as the code. The first revision of the project took 3 weeks to complete from start to finish but the second revision was completed in 1 day, as most of the hurdles in coding and design were skipped on the second time around. From working on several projects of different complexities, this project can definitely be easy-medium in difficulty if you stick to the instructions. However, it can get difficult if you want to make changes to the programming or general design. The project can take several routes in terms of the finished product and its overall look. These different routes include how the lights appear and the physical pattern that the rods form. For fans of lights that shimmer, you can leave the rods as they are. If you are a fan of matte colors with little variance, you can choose to sand the rods.”