
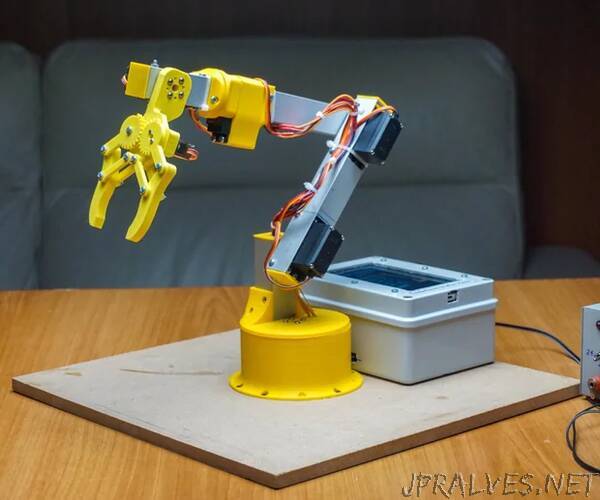
“Hello. Today I’m here to see with you how I built a robotic arm with Arduino and a graphic touch interface.
I want to say that for me this is not a simple mixture of various components that build a finished object together but it is something much more, a real project that started from an idea born from my passion months ago and ends today with the publication of this article.
Thanks to the graphic interface it is possible not only to move the various joints in all possible directions but also to program the movements to be performed repeatedly
But now, get comfortable and let’s see what we need to make it!
Supplies
- Square aluminum tube (25mm * 25mm * 1,5mm)
- A fairly powerful power supply (2.5A * 5 motors (but you won’t be using them all at the same time)
- Any Arduino board (I used Arduino UNO)
- HC05 Bluetooth module
- One SG90 Servo Motor (I got the one with metal gears)
- 5x MG996R Servomotors (more powerful than SG90)
- Wooden platform (for stability)
- Junction box (for electrical connections)”