
“Battery life has become a key competing feature between mobiles, laptops, wearable devices, etc. Over charging a battery leads to an effect called the “battery-effect”, where due to charging a devices battery past it’s power limit leads to decrease in battery life. I have lost phones due to this problem. There are various situations of over-charging - forgetting to switching off the charger, leaving the device on charging and going out, etc. So I decided to make a device that would help me solve the problem of over-charging my devices. Hence, I came upon the idea of the “Particle Switch.”
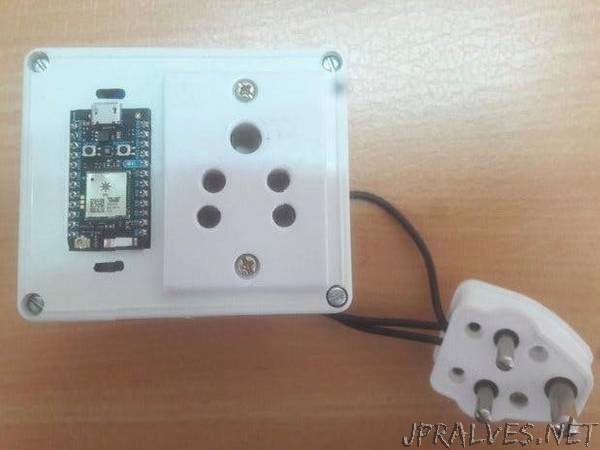
The Particle Switch is basically an AC circuit switching hardware. At its heart is a WiFi-enabled microcontroller which is controlled through a custom Android app.
(Warning : We are going to deal with very high voltages. Please take the necessary precautions.)
Hardware Construction:
The hardware consists of 4 main parts:
Circuit to convert 240V AC to 5V DC
Circuit to convert 5V DC to 3V DC
Particle Photon
Switching Circuit
The basic working of the hardware is that it takes the 230V AC from the wall and converts it to 5V DC. This is further step down to 3V to supply power to the microcontroller. Here we are using the Particle Photon as our microcontroller because of it’s wifi capability and the amazing community where you can get all the info and support related to the device and it’s related software. This device is used to switch on or off the AC circuit of the wall socket by switching it’s GPIO pin D0 to control the switching circuit.
For the first circuit we are using the MORNSUN LS03-15B05SR2S(-F) to convert the 230V AC from the wall to 5V DC so that it can be used as power supply to the Photon after stepping it down. This circuit helps the Photon to work continuously without the need for a battery supply, saving the hassle of charging/changing the Photon’s battery. Use the datasheet to understand the specs of the module and make the application circuit in the datasheet to use the module. You can either use Eagle CAD to design the PCB and give it to PCB manufacturing house to get a ready made PCB or make the circuit manually on a perf-board/copper clad PCB.”